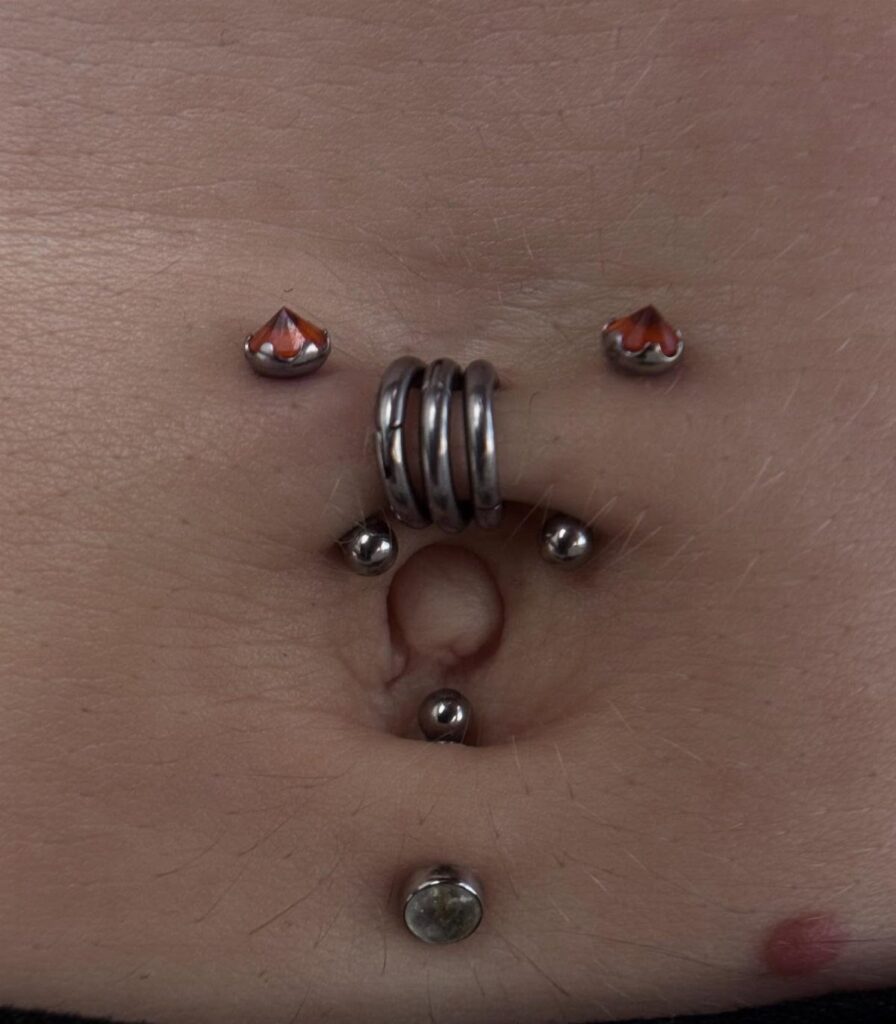
The 3 ideas here run from a placement choice (the inverse navel piercing, which hangs from the lower rim of the belly button) to two problems you may meet later: infection and plain irritation.
If the piercing is already in and the skin looks red, discharge or crusting is the sign I watch for, and it means an experienced piercer or a doctor should look at it instead of leaving it to home care.
1. Inverse Navel Piercing
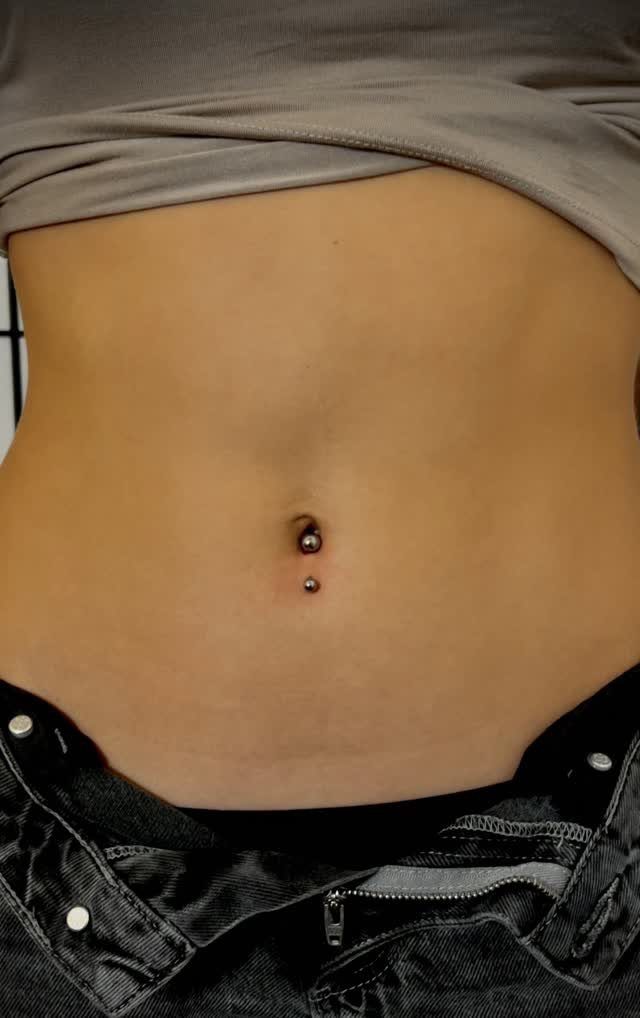
This piercing goes through the lower rim of the belly button, so the jewelry hangs down from the bottom edge rather than from the top, as a standard navel piercing does.
A curved barbell in titanium or implant-grade steel suits this placement best.
If you came looking for the difference from a traditional navel piercing, that is it: the same area, a different fold. I like how it reads as a quieter, less expected choice.
A piercer can tell you in a minute whether your navel has enough tissue at the bottom to hold this piercing, so get that opinion first.
Cost, healing time and aftercare depend on the piercer and your body, so get a quote and a written aftercare plan at the consultation.
2. Navel Piercing Infection
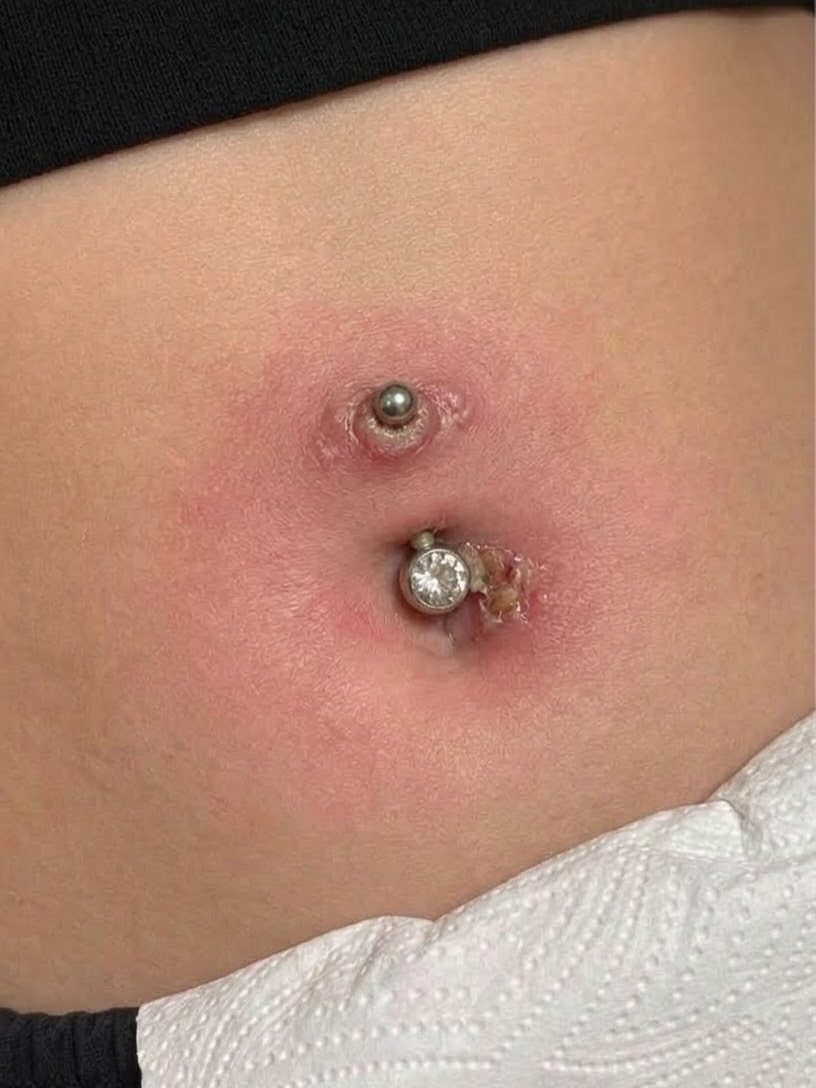
Red, swollen skin with discharge and crusting around the jewelry is what an infected navel piercing looks like, and it needs attention rather than waiting.
Leave the jewelry in unless a professional tells you otherwise.
Taking it out can let the hole close over the problem. Avoid picking at the crust, and keep your hands clean before touching the area.
Because discharge is involved, I would not rely on home care alone.
A doctor or an experienced piercer can tell irritation from infection and say what comes next. Treatment cost depends on what they find, so ask before you assume.
Wait at least 3 months after you deliver your baby before getting a navel piercing to allow your body’s immune system time to become normal again.
— WebMD
3. Navel Piercing Redness and Swelling
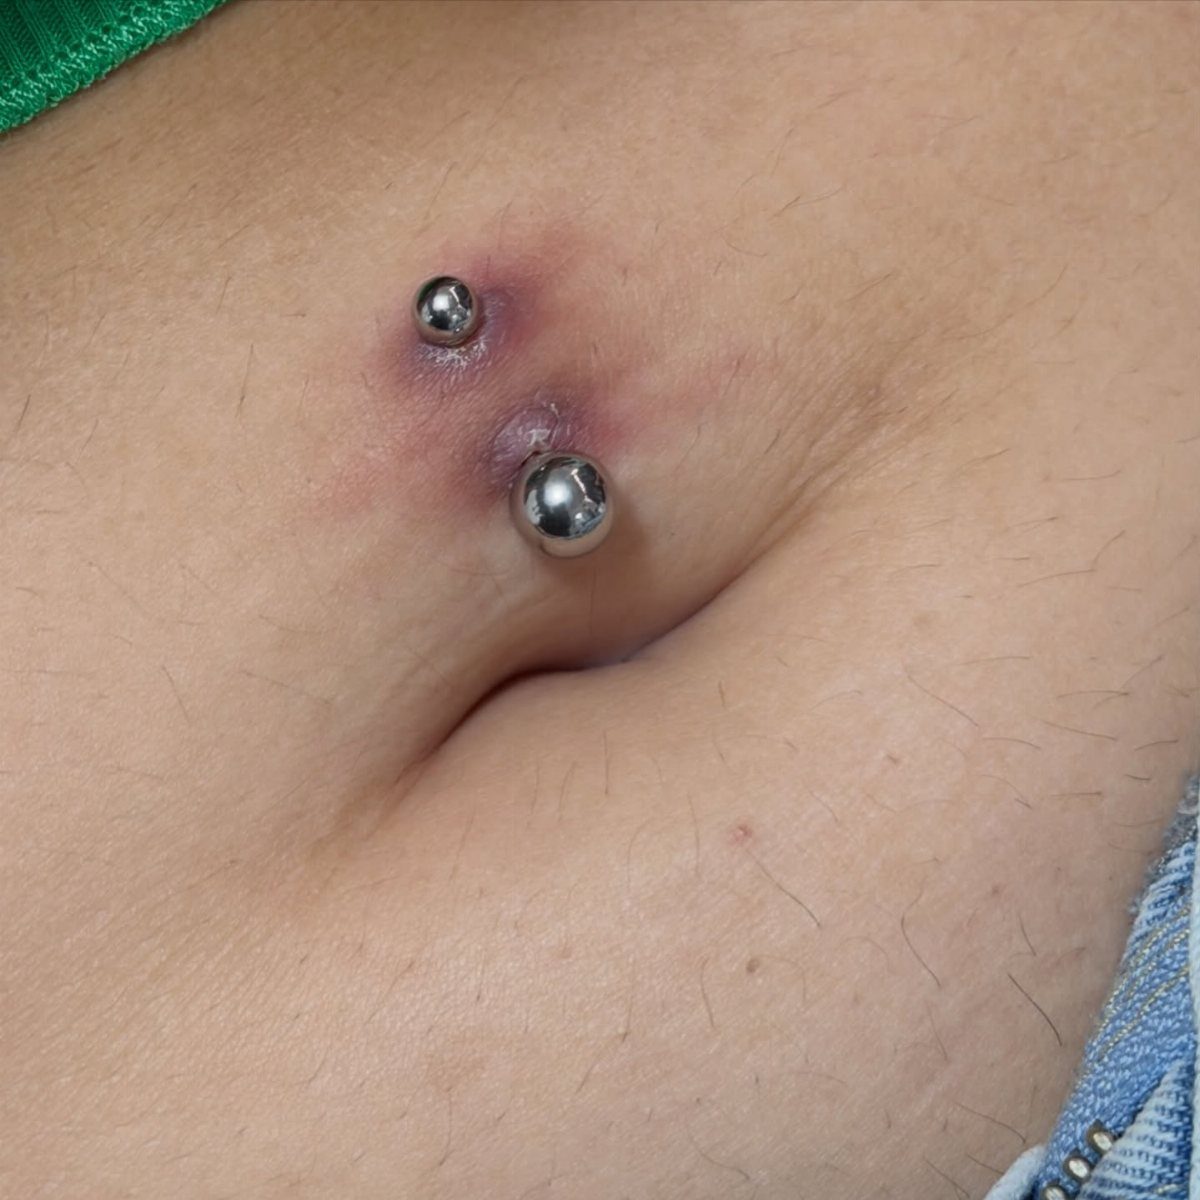
Redness and swelling around a barbell piercing is the most common warning that a navel piercing is irritated. Silver jewelry sitting in puffy skin usually means something is bothering the area.
Without discharge or crusting, it may be irritation instead of infection, but I would still treat it gently. Stop twisting or fiddling with the jewelry, and watch whether the swelling shrinks or spreads.
If the skin stays red and swollen, or gets worse, have a piercer or doctor look at it. That visit costs far less than letting a problem drag on.
Choosing a Piercer
A license on the wall shows the shop is registered, and that is all it shows; it says nothing about how steady the piercer’s hands are.
Ask how many years they have been piercing, who trained them, and what classes or seminars they still attend.
A good one will talk through their training and your piercing without getting defensive, and if you don’t trust the answers, walk out and find another.
Look at the room itself. Look for a clean, bright room, and check whether the piercer or shop holds Association of Professional Piercers membership, with the certificate hung where customers can read it.
Every tool should arrive in a sealed sterilization pouch, opened in front of you.
Jewelry Selection
Titanium and medical-grade stainless steel are the safe starting point. Two other good options are 14-karat gold and niobium.
Inspect the piece before it goes in. The finish should be shiny, with no nicks, scratches, or rough edges.
Skin grows into irregular surfaces, so every time the jewelry moves it can tear that tissue. Repeated tearing leads to scarring and slower healing.
Size matters as much as metal. A bar that is too short or too long for your body causes problems, so let the piercer fit it rather than guessing.
Avoiding Complications
Keep your original jewelry in until the piercing is fully healed, and have the piercer check it before you swap anything.
Stay out of lakes, the sea, spas, and swimming pools. Public water holds a lot of bacteria, and a fresh piercing is an open wound.
For daily care, I recommend a sea salt soak twice a day.
Use non-iodized salt and filtered water, 4 teaspoons of salt to a gallon, warmed. Press a shot glass over the piercing to create light suction, lean back, and soak for 5–10 minutes.
Frequently Asked Questions
What is the difference between a navel piercing and an inverse navel piercing?
Position is the only real difference. Placement is the whole difference: a standard navel piercing goes through the upper rim of the belly button, and the inverse version goes through the lower rim.
If you have more skin along the lower part of your navel, the inverse placement may suit you better, and some people pierce both for a double navel look.
How long does a belly button piercing take to heal?
Plan on up to 12 months for a belly button piercing to heal fully. Wait at least 6 months before changing the jewelry, and have your piercer confirm it is ready, since healing can be hard to judge by eye.
Timing and price shift from one piercer and one body to the next, so get the aftercare plan in writing.
What piercing has the highest rejection rate?
Because a navel piercing sits flat along the surface of the skin, the body pushes it out more often than it does with most other spots.
The jewelry first migrates toward the surface, then the body pushes it out, the way it would a splinter.
Common causes are jewelry of the wrong size, a nickel allergy from cheap metal, and a piercing that was not made correctly.
How do I know if my belly button piercing is rejecting?
Watch for soreness that lingers with no sign of infection, jewelry that looks more visible under the skin, or a barbell that has gone loose.
The strip of skin between the entry and exit holes can also get thinner. If you see these signs, have a piercer check it.
Do you need a flat stomach for a belly button piercing?
No, you can have a belly and still get a navel piercing.
Loose skin around the ring can cause friction and irritation, so look for a piercer with experience piercing curvier bodies. You may need to talk to a few before you find the right one.